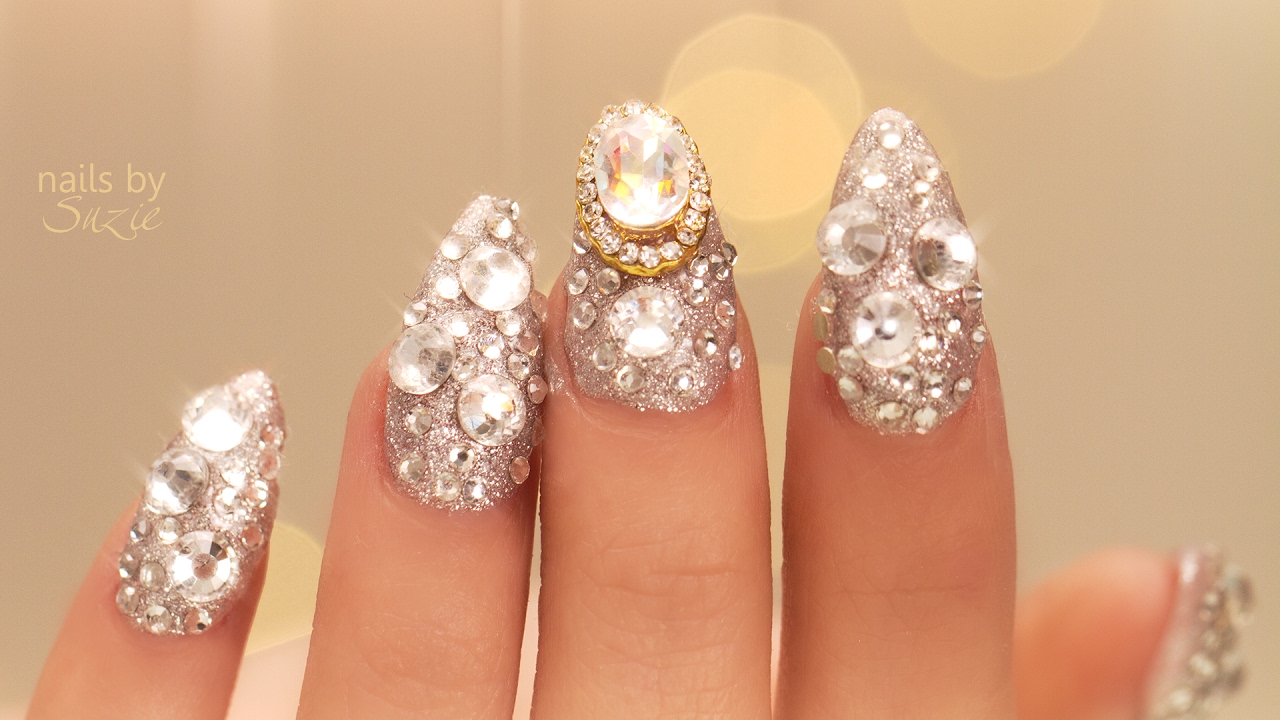
Nail art has become increasingly popular over the last few years. It is a great way to add some personality to your nails. Applying nail art jewels is a relatively simple process, but there are a few things you need to know before you get started.
First, you will need to purchase some nail art jewels. You can find these at most beauty supply stores or online. Second, you will need to decide what design you want to create.
Once you have your supplies and design in mind, you are ready to get started!
- Begin by applying a base coat to your nails in order to protect them from the polish and jewels
- Next, apply your desired color of nail polish to your nails
- Allow them to dry completely before proceeding
- To apply the jewels, first dip the jewel into some clear nail polish or glue
- Place the jewel on your nail where desired and press down gently to adhere
- Repeat this process for each nail until you are satisfied with the design
- Finally, apply a top coat of clear polish to seal in the design and protect your nails!
Credit: www.youtube.com
How Do You Attach Rhinestones to Nails?
There are a few different ways to attach rhinestones to nails, and the method you choose will depend on the type of rhinestone and the look you’re going for. If you’re using flat-backed rhinestones, you can use nail glue or clear adhesive tabs. For hotfix rhinestones, which have a molten glue on the back, you’ll need to use a special hotfix tool or household iron.
Nail Glue
To use nail glue, start by applying a thin layer of glue to your nail. You can either apply it directly to the area where you want to place the rhinestone, or put some on a piece of paper and use a toothpick or other sharp object to pick up and apply the glue.
Next, position the rhinestone on your nail and hold it in place for 30 seconds to 1 minute until the glue dries. If necessary, apply pressure with your finger or another object so that therhinestone is level with your nail surface. Finally, seal with top coat if desired.
Adhesive Tabs
Adhesive tabs are similar to Band-Aids but without the gauze in the middle – they’re just sticky! To use them, start by peeling off one side of an adhesive tab and sticking it down onto your nail.
Then peel off the other side of the adhesive tab (being careful not to touch any surfaces with this sticky side) and press it firmly over top of the rhinestone so that it sticks down. Hold in place for 30 seconds before releasing pressure – this will ensure that even small stones stay put! You can then file off any excess adhesive tab material around the edges of your stone using a sharp manicure scissors or clippers.
Finish with top coat if desired.
Hotfix Rhinestones/Iron Method
If you’re using hotfix (also called heat transfer) rhinestones, you’ll need either a special hotfix tool OR a household iron to attach them.
First things first – make sure your work surface is protected from heat damage by placing something underneath like an old towel or t-shirt scrap. Next, preheat either your hotfix tool OR iron according to manufacturer’s instructions – usually this means setting it to “hot” or “cotton�� setting if using an iron.
How Do You Apply Nail Art Accessories?
There are a few different ways that you can apply nail art accessories. The most popular way is to use a striping brush. This brush is specifically designed for applying stripes of polish to the nail.
To use a striping brush, first paint your nails with a base coat of polish. Once the base coat is dry, dip the tip of the striping brush into the desired color of polish and then stripe it across your nails. You can also use a dotting tool to apply small dots of polish to your nails.
Another way to apply nail art accessories is to use self-adhesive gems or rhinestones. Simply peel off the backing and stick them onto your nails. If you want something a little more permanent, you can glue them on with clear nail glue.
Do You Put Rhinestones on before Or After Top Coat?
Rhinestones are a great way to add some sparkle and bling to your nails. But when it comes to applying them, there is some debate on whether you should put them on before or after your top coat.
Some people say that putting the rhinestones on before the top coat helps them stay in place better.
Others find that putting them on after the top coat gives a cleaner look.
Personally, I like to put my rhinestones on after the top coat has been applied. I find that this gives a neater finish and also helps to prevent any of the adhesive from seeping through and ruining the look of my manicure.
Whichever way you choose to do it, just be sure that your nails are completely dry before applying the rhinestones. Otherwise they may not stick properly or could fall off later on.
What Glue Do You Use to Put Rhinestones on Nails?
There are a few different types of glue that can be used to attach rhinestones to nails. The most common type is clear nail glue, which can be found at most beauty supply stores. Another option is white glue, which will give the rhinestones a slightly raised look.
Finally, there is gel nail glue, which is what professionals use and gives the strongest hold.
To apply the glue, start by slightly dampening the back of the stone with water. This will help the glue to adhere better.
Then, apply a small amount of glue to the center of the stone and press it onto the nail. Hold it in place for a few seconds until the glue sets. Repeat this process for each rhinestone you want to add to your nails.
Once all of the stones are in place, you can seal them with a top coat of clear polish or gel top coat (cured under UV light). This will help keep them secure and prevent them from falling off.
How To Secure Rhinestone on Nail Applications
How to Apply Nail Gems Without Glue
Nail gems are a great way to add some sparkle and pizzazz to your nails, but they can be a bit tricky to apply. Here are some tips on how to apply them without glue:
1. Start with clean, dry nails.
If your nails are oily, you can use a little nail polish remover on a cotton ball to help remove any excess oils.
2. Place the nail gem on your nail where you want it. You can use tweezers or your fingers to position it.
3. Once you have the gem in place, take a toothpick or other sharp object and gently press down on one side of the gem. This will help “anchor” it in place so it doesn’t move around when you topcoat it later. Repeat this step on all sides of the gem.
4. Now it’s time to topcoat! Use a clear topcoat or even just clear nail polish and paint over the entire nail, being sure to seal in the edges of the gem as well. You can also add additional topcoats for extra shine and protection.
Conclusion
If you’re looking to add some extra sparkle to your nails, then nail art jewels are the way to go! They come in all sorts of shapes and sizes, so you can really get creative with your design. Here’s how to apply them:
1. Start with a clean base. Make sure your nails are free of any polish or debris before starting.
2. Apply a thin layer of glue.
Use a jeweler’s glue or a clear nail polish to adhere the jewels to your nails.
3. Place the jewels on your nails. You can use tweezers to help position them if needed.
4. Press down firmly and wait for the glue to dry completely before proceeding .