Nail art is a fun and creative way to express your personality. Polygel is a type of nail extension that is becoming increasingly popular. It is strong and durable, yet flexible and easy to work with.
In this article, we will show you how to do nail art on polygel.
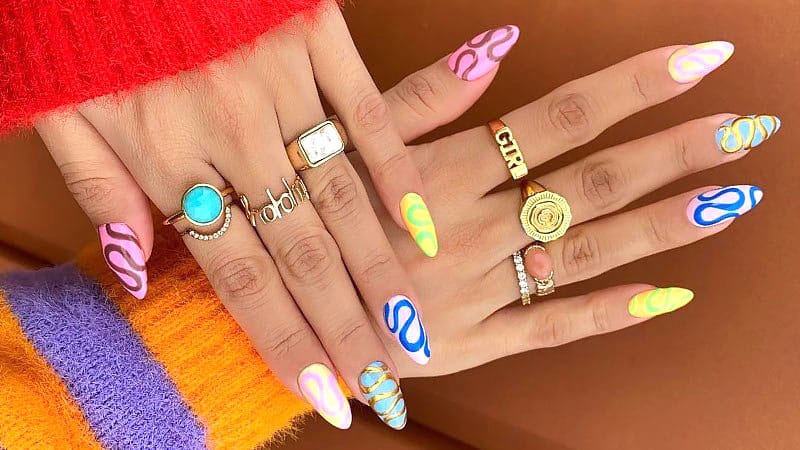
There are many different ways to do nail art on polygel. You can use stamps, stencils, or even freehand designs.
The sky is the limit! If you are new to polygel nails, we recommend starting with a simple design. Once you get the hang of it, you can start experimenting with more complex designs.
DIY French Polygel Nails for Beginners
- Choose your desired color of polygel and cut off a small piece
- Using a nail art brush or dotting tool, create your design on the nail
- Cure the gel under a UV or LED light for about 30 seconds to 1 minute
- Apply a top coat if desired and cure again for 1 minute
Polygel Nail Art Kit
A polygel nail art kit is a great way to add some pizzazz to your nails. With this kit, you can create unique designs and colors that will really stand out. The kit includes everything you need to get started, including a base coat, top coat, gel polish, and UV light.
Credit: www.thetrendspotter.net
Can You Use Polygel Nail Art?
Polygel is a type of nail enhancement that is becoming increasingly popular. It is similar to acrylics and gel nails, but there are some key differences. Polygel nails are thinner and more flexible than other types of enhancements, making them more comfortable to wear.
They also last longer and are less likely to chip or break.
Polygel nail art is a relatively new trend, but it is quickly gaining popularity among professional manicurists and at-home enthusiasts alike. This type of art uses a special gel polish that hardens when exposed to UV light.
The gel can be used to create a variety of designs, from simple stripes or polka dots to more complex patterns.
When applied correctly, polygel nail art can last for several weeks without chipping or fading. However, it is important to note that this type of art is not suitable for everyone.
Those with sensitive skin or allergies may experience irritation from the gel polish. If you have any concerns, be sure to consult with your manicurist before proceeding with polygel nail art.
Can You Paint on Top of Polygel Nails?
Polygel nails are a type of nail extension that is becoming increasingly popular. They are similar to acrylics in that they are applied with a brush and harden when exposed to air, but they are made from a gel base instead of a powder. Polygel nails are said to be stronger and more flexible than acrylics, and can be less damaging to the natural nail bed.
One of the great things about polygel nails is that they can be painted over just like regular fingernails. You don’t need to use any special techniques or products, just your regular nail polish! The key is to make sure that the polygel nails are completely dry before you start painting.
If they’re even slightly damp, the polish will not adhere properly and will likely chip off within a day or two.
So if you’re looking for a versatile and durable option for your next set of fake nails, consider polygel!
How Do You Apply Nail Forms With Polygel Nails?
When applying nail forms with Polygel nails, you will need to start by preparing your nails. This includes cleaning and buffing your nails, as well as pushing back your cuticles. Once your nails are prepped, you will then need to select the right size form for each nail.
To do this, hold the form up to your nail and mark where it needs to be trimmed. Once all of the forms are trimmed, you can then begin applying them to your nails.
To apply the form, start at the base of your nail and press down firmly.
Then, using a brush or spatula, smooth out the Polygel around the form until it is evenly distributed. Make sure that there are no air bubbles trapped under the form. Once all of the nails have been done, you can then move on to curing them under a UV or LED light.
Curing times will vary depending on which type of light you are using, but typically range from 2-3 minutes per nail. After curing, you can then remove the forms and admire your beautiful new Polygel nails!
Can You Sculpt Nails With Polygel?
If you’re looking for a versatile and strong product to use for your sculpted nails, then polygel may be the answer! This product is becoming increasingly popular among those who want to achieve long-lasting, beautiful nails. So, can you sculpt nails with polygel?
The short answer is yes! Polygel can be used to create many different nail shapes and designs. It is a great alternative to traditional acrylics or gel nail polish, as it does not require a UV light to cure and harden.
This means that you can work with it for longer without worrying about the product drying out or becoming brittle.
Polygel also has some major advantages over other products on the market. Firstly, it is much more flexible than acrylics, meaning that it is less likely to crack or chip once applied.
Secondly, it provides a much stronger bond between the natural nail and the extension, meaning that your sculpted nails will last longer. Finally, polygel is much easier to remove than other products – simply soak your nails in acetone for 10 minutes and they will easily come off.
So if you’re considering using polygel for your next set of sculpted nails, rest assured that it is a strong and versatile product that will give you beautiful results!
Conclusion
Nail art is a fun way to express your personality, but it can be tricky to get the hang of it. If you’re looking to try out nail art on polygel, there are a few things you need to know first.
To start, you’ll need a base coat and top coat of polish, as well as a color of your choice for the design.
You’ll also need a dotting tool or toothpick. Once you have all of your supplies, you can start by creating a basic design with the dotting tool.
Once you’re happy with your design, you can add more details with the toothpick.
Remember to keep your designs small and simple at first – you can always add more complexity later on!