Sewing your own outdoor seat cushion covers is a great way to personalize your patio furniture and save money. The process is relatively simple, even if you’ve never sewn before. With a few supplies and some patience, you can sew covers for all of the cushions on your patio furniture.
How to Make a Basic Cushion | 1 Piece Box Cushion | 30 Minute Cushion
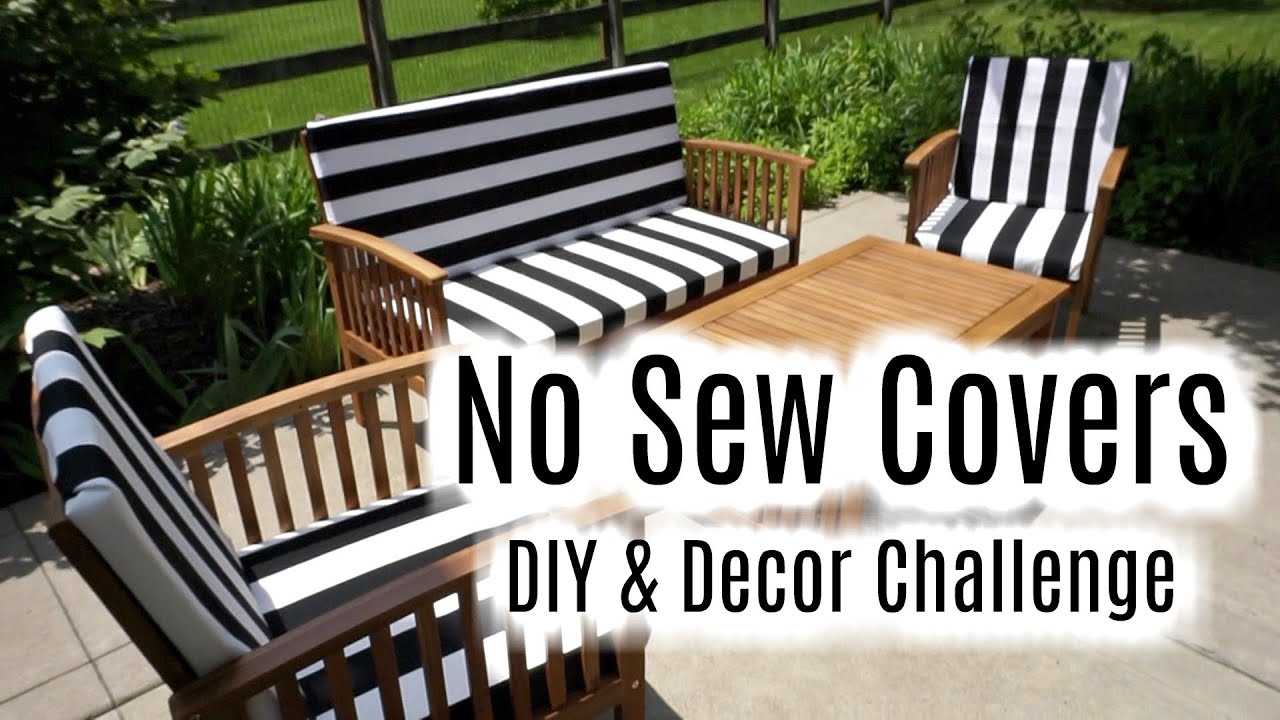
- Gather materials needed including fabric, scissors, and a sewing machine
- Cut the fabric to the desired size for the cushion cover
- Sew the sides of the fabric together, leaving an opening for turning inside out later
- Turn the fabric right side out and insert the cushion into the cover
- Sew the opening closed and enjoy your new outdoor seat cushion cover!
How to Sew a Box Cushion Cover No Zipper
If you’ve ever wanted to know how to sew a box cushion cover without a zipper, then this tutorial is for you! This method is quick and easy, and produces a professional-looking result.
First, gather your materials.
You’ll need a piece of fabric that’s large enough to wrap around your cushion, plus some extra for seam allowances. A sewing machine and thread are also required.
Next, cut your fabric to size.
Make sure to add an extra inch or two all the way around for seam allowances.
Now it’s time to start sewing! Begin by creating a hem at one end of the fabric panel.
To do this, simply fold over the edge of the fabric twice and stitch it in place. Repeat this step at the other end of the panel.
Once both ends are hemmed, it’s time to sew the side seams.
Fold the fabric in half lengthwise, wrong sides together, and stitch along the long edge. Press these seams open with an iron once they’re sewn.
Finally, it’s time to finish off the raw edges of the cushion cover.
You can do this by either binding them with bias tape or using a serger (if you have one). If you’re using bias tape, simply sandwich the raw edges between two strips of tape and stitch in place all around the perimeter of the cover. If you’re using a serger, just run it along all four edges of the cover to clean them up quickly and easily.
Credit: www.youtube.com
How Do You Sew Outdoor Cushion Covers?
If you want to sew outdoor cushion covers, there are a few things you need to keep in mind. First, you need to choose a fabric that is durable and can withstand the elements. Second, you need to make sure the seams are sealed so that water cannot get in and ruin the cushion fill.
And finally, you need to use a thread that will not rot or mildew in the outdoors.
To start, measure the width and height of your cushion insert. Add 1 inch to each measurement for seam allowances.
Cut two pieces of fabric using these dimensions.
Next,Pin the two pieces of cut fabric together with right sides facing each other. Sew around all four sides using a 1/2-inch seam allowance.
Leave a 4-inch opening along one side for turning and stuffing the cushion cover later on.
After sewing, trim the corners of the sewn piece to reduce bulk when turning it right side out later on. Then turn the sewn piece right side out through the 4-inch opening that was left earlier.
Use a chopstick or similar tool to help push out the corners so they are nice and sharp.
Now it’s time to stuff your cushion cover! Place your insert into the cover through the opening, then carefully remove any wrinkles and smooth everything out so that it looks good from all angles.
.
How Can I Cover My Outdoor Cushions Cheap?
Outdoor cushions can be a great way to add comfort and style to your outdoor furniture, but they can also be expensive. If you’re looking for ways to save money on outdoor cushions, there are a few things you can do.
One option is to buy used or clearance cushions.
You can often find these at garage sales, thrift stores, or online classifieds sites. Another option is to make your own cushions. This can be a great way to get exactly the style and color you want without spending a lot of money.
If you’re handy with a sewing machine, you can easily make your own cushion covers. Start by measuring the size of your existing cushion and then cut out a piece of fabric that’s slightly larger. Sew the fabric together, leaving an opening for stuffing, and then stuff the cushion with polyester filling.
Finally, hand-sew the opening closed and voila! You’ve got yourself a custom cushion cover.
If sewing isn’t your thing, there are still plenty of ways to make inexpensive cushion covers.
One option is to use old pillowcases or sheets as covers. Simply slip them over the top of your cushions and secure them in place with safety pins or Velcro strips. Another option is to purchase some inexpensive fabric from a craft store and wrap it around the cushions like you would wrapping paper on a present.
Secure the fabric in place with hot glue, staples, or tape, and then trim off any excess material.
What Type of Filling Do You Use for Outdoor Cushions?
Outdoor cushions can be filled with a variety of materials, depending on the desired look and feel. Some popular fillings include polyester fiberfill, down, and foam. Polyester fiberfill is a synthetic material that is often used in outdoor cushions because it is inexpensive and easy to care for.
Down is a natural material that provides good insulation and cushioning, but it can be more expensive than other options. Foam is also a popular choice for outdoor cushions, as it provides good support and durability.
How Do You Fix Ripped Outdoor Cushions?
It’s inevitable – over time, your outdoor furniture cushions will suffer wear and tear. But don’t despair, there are several ways you can fix ripped outdoor cushions and prolong their life.
One way to fix ripped outdoor cushions is to use a heavy-duty sewing needle and thread to sew up the rip.
This method works best if the rip is small. Start by turning the cushion cover inside out so that the wrong side is facing out. Then, using a strong thread (like polyester or nylon), sew along the edges of the rip, making sure to backstitch at the beginning and end.
Once you’ve sewn up the rip, turn the cover right side out and voila – your cushion is as good as new!
If the rip in your cushion is large, or if you’re not confident in your sewing abilities, another option is to use adhesive fabric patches. These come in a variety of sizes and colors, so you can find one that closely matches your cushion fabric.
To apply a fabric patch, simply peel off the backing and press it into place over the hole or tear. For extra security, you can stitch around the edges of the patch with a needle and thread.
No matter which method you choose to fix ripped outdoor cushions, it’s important to take preventive measures to extend their life.
First, store cushions in a cool, dry place when they’re not in use – this will help prevent mold and mildew from forming. Second, invest in some good quality covers for your furniture; this will protect your cushions from dirt, sun damage and other elements that can shorten their lifespan. With a little TLC, your outdoor furniture cushions will last for years to come!
Conclusion
Sewing your own outdoor seat cushion covers is a great way to personalize your patio furniture and save money. With a few supplies and some basic sewing skills, you can sew new covers for your cushions in no time.
To get started, you’ll need to measure your existing cushion covers or the foam inserts if you don’t have any covers.
Once you have those measurements, add 1/2 inch all the way around for seam allowance. Cut out your fabric using these dimensions.
Next, hem all four sides of each piece of fabric.
To do this, simply fold over the edge about 1/4 inch and then again so that the raw edge is hidden inside the fold. Sew along the innermost fold to create a clean hemmed edge.
Now it’s time to sew the two pieces of fabric together, right sides facing each other.
Sew along three sides, leaving one side open for turning the cover right side out later on. Trim any excess threads and turn the cover right side out through the opening you left earlier.
Finally, insert your cushion into the cover and stitch up the final open side.
That’s it – you’re done!