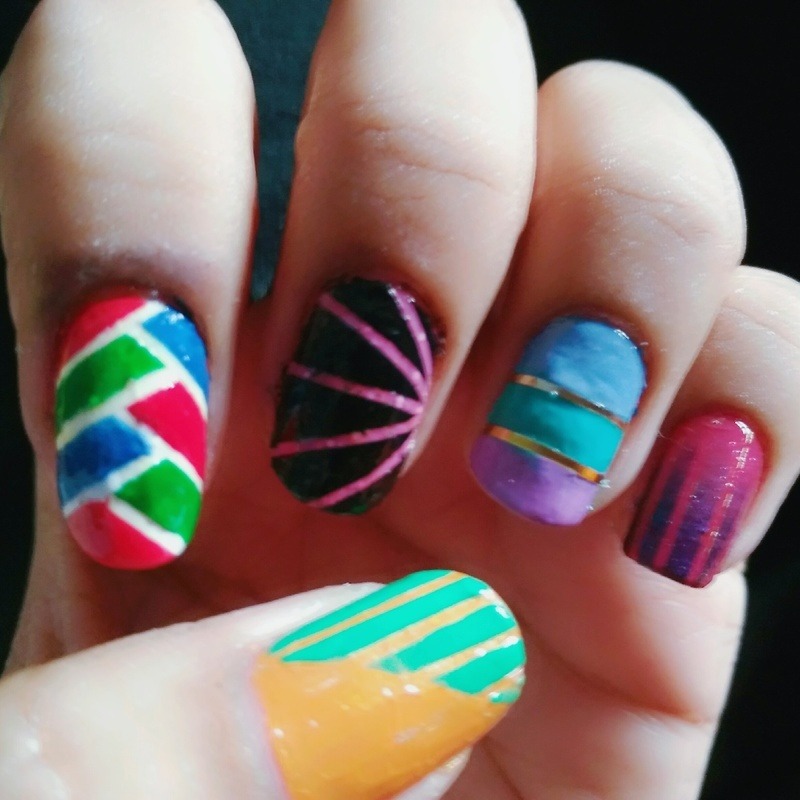
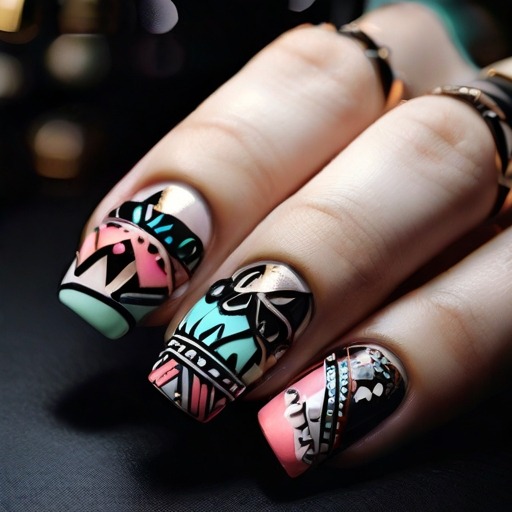
When it comes to nail art, there are endless possibilities. You can go for a simple design or something more intricate. One popular trend is striping tape nail art. This involves using strips of tape to create designs on your nails. It’s a relatively simple process that can produce some stunning results. Here’s a quick guide on how to use nail art striping tape.
TUTORIAL | HOW I APPLY STRIPING TAPE
Nail art stripping tape is a great way to add some pizzazz to your nails. You can use it to create all sorts of designs, from stripes and geometric shapes to flowers and leaves. The best part about nail art stripping tape is that it’s super easy to use.
Here’s a quick guide on how to get started:
1. Start with clean, dry nails. If you want your design to last longer, apply a base coat before starting.
2. Cut strips of nail art stripping tape to the desired length and width.
3. Apply the strips of nail art stripping tape onto your nails, following the desired pattern or design. Use a tweezer or toothpick if needed for precision placement.
4 . Once you’re happy with the design, carefully seal the edges of the nail art stripping tape with a top coat or clear polish. This will help prevent peeling and chipping.
5 . Enjoy your fabulous new nail art!
Choosing the Right Striping Tape for Your Nail Art
Choosing the right striping tape for your nail art can make all the difference in achieving clean and precise designs. When selecting striping tape, consider the thickness, flexibility, and adhesive quality of the tape. Thinner tapes are easier to manipulate and create fine lines, while thicker tapes can add more dimension to your nail designs. Flexible tapes can bend and curve around the contours of your nails, allowing for more intricate and detailed patterns.
Additionally, choosing a tape with strong adhesive will help prevent lifting and ensure that your designs stay in place. It’s also important to consider the color of the tape, as it can complement or contrast with the nail polishes you plan to use. Ultimately, choosing the right striping tape for your nail art is about finding a balance between ease of use, versatility, and durability to achieve the perfect look for your nails.
Step-by-Step Guide: How to Apply Nail Art Striping Tape
To apply nail art striping tape, first start with clean, dry nails. Choose a base color and apply it to your nails. Once the base color is dry, decide on a design for your nail art and cut the striping tape to the desired length. Carefully place the striping tape onto your nails in the pattern you’ve chosen, making sure it’s securely pressed down.
Once the tape is in place, apply another color of nail polish over the tape and the rest of the nail. Before the polish dries completely, carefully remove the striping tape to reveal the design underneath. Finally, apply a top coat to seal in the design and add a glossy finish. With a little bit of practice and patience, you can create intricate and beautiful nail art designs using striping tape. Experiment with different colors and patterns to create unique and eye-catching nail art.
How to Use Striping Tape on Gel Nails
If you’re looking for a way to add some extra flair to your gel nails, striping tape is a great option! Striping tape is a thin, adhesive tape that comes in a variety of colors and patterns. You can use it to create all kinds of designs, from simple lines to complex geometric shapes.
To use striping tape on gel nails, start by applying a base coat of gel polish. Then cut pieces of striping tape to the desired length and apply them to the nails. Once the strips are in place, paint over them with another layer of gel polish. When the polish is dry, carefully remove the strips, and voila – you’ve got yourself some stylish striped nails!
You May Also Like: How to Put Nail Art for Beginners
How Do You Do Nail Art With Tape?
Nail art is a creative way to decorate your nails. It can be simple, like a design painted on with a brush, or more complex, like an intricate design made with tiny beads. You can even use tape to create interesting patterns and designs on your nails.
To do nail art with tape, start by painting your nails with a base coat of polish. Then, cut small pieces of tape and place them on your nails in the desired pattern. Once the tape is in place, paint over it with another layer of polish.
When the polish is dry, carefully remove the tape to reveal your design! Tape nail art is a great way to add some extra pizzazz to your manicure. With just a little bit of time and effort, you can create unique and eye-catching designs that are sure to impress everyone you meet!
Do You Put a Top Coat Over Nail Tape?
When it comes to nail art, there are a lot of different techniques and products that you can use to create unique and beautiful designs. One popular technique is using nail tape to create clean lines and geometric shapes. But once you’ve applied the tape, do you need to apply a top coat over it?
The short answer is no. You don’t necessarily need to apply a top coat over nail tape. The adhesive on the tape will help it stay in place, and as long as you press the edges of the tape down firmly, your design should be secure. However, if you want your manicure to last longer or you’re concerned about the tape peeling up at the edges, applying a top coat can help.
To apply a top coat over nail tape, start by painting your nails with a base coat or polish in the color of your choice. Once that’s dry, apply the nail tape in whatever design you like. When everything is in place, carefully paint over the entire design with a clear top coat.
This will seal everything in place and help protect your manicure from wear and tear. So there you have it! Whether or not you choose to apply a top coat over your nail tape is up to you. If you’re looking for extra protection or want your manicure to last longer, go ahead and add that extra step. Otherwise, enjoy showing off your fabulous DIY nail art!
Frequently Asked Questions (FAQs)
What is nail art striping tape?
Nail art striping tape is a thin, adhesive tape used in nail art to create intricate designs and patterns. It comes in various colors and metallic finishes, allowing you to add detailed lines and accents to your nails.
How do I apply nail art striping tape?
To apply nail art striping tape, start with clean, dry nails. Cut the tape to the desired length using nail scissors and gently press it onto the nail surface. Ensure that the tape adheres well to avoid any polish bleeding underneath. Trim any excess tape and seal the design with a clear topcoat.
Can nail art striping tape be used with any nail polish?
Yes, nail art striping tape can be used with most nail polishes. However, it’s recommended to use a high-quality, fast-drying polish to prevent smudging. Additionally, make sure the base color is completely dry before applying the tape for best results.
How long does nail art striping tape last on the nails?
The longevity of nail art striping tape depends on factors such as the quality of the tape, application technique, and daily activities. Generally, it can last several days to a week when applied correctly and sealed with a topcoat. Avoid exposing your nails to excessive moisture to prolong the tape’s lifespan.
Can I combine nail art striping tape with other nail art techniques?
Absolutely! Nail art striping tape works well with other nail art techniques like gradient, stamping, or freehand designs. Experiment with different combinations to create unique and personalized nail art looks. Just ensure that each layer is dry before moving on to the next step for a clean and polished result.
Conclusion
Nail art striping tape offers a quick and easy way to elevate your manicure with endless design possibilities. Its versatility makes it accessible for both beginners and experienced nail artists. Whether creating simple stripes or intricate patterns, the application is straightforward, and the results can be sealed with a topcoat for longevity.
The tape can also be used effectively on gel nails. While a top coat isn’t mandatory, it can enhance durability. Nail art striping tape is a fantastic tool for DIY nail art, allowing you to showcase your creativity and style with minimal effort.